top of page


Gallery
 table finished-ish |  table front clad 3 |  table behind frame 1 |
|---|---|---|
 table behind frame 4 |  Table front frame 2 |  Table base 2 |
 control sockets |  lightbox 1 |  lightbox 3 |
 light box 2 |  Light boxes stained |  Ceiling clouds stained |
 Ceiling clouds |  Lighting boxes |  Live Room 1st Coat |
 Corner Bass Traps 2 |  Corner Bass Traps |  Corner Bass Trap |
 Finished Window |  |  Fitting First Pane |
 IGU Adam |  Window Interior |  |
 |  |  |
 |  |  |
 |  |  |
 |  |  |
 Varnished Wood Slats |  |  filler first coat 2 |
 filler first coat |  filler close-up |  taped joints |
 taped joint close-up |  |  |
 |  Another door! |  |
 |  Second layer plasterboard12.5mm high density |  |
 |  First layer plasterboard19mm regular density |  |
 |  |  |
 resillient channels |  Resillient channel installed |  Genie Clips |
 Genie Clip installed |  |  |
 Control room curvesEmpty sections on the side for feeding more cables. |  The door works! |  |
 First door |  Panorama of the control room |  |
 |  |  |
 First CCTV camera |  |  CCTV System has arrived |
 Really heavy acoustic plasterboard |  Pipeline for the audio cables |  |
 |  |  |
 |  Rockwool DeliveryThis is about 1/3rd of the total mineral we need. |  Control Room 3Starting to take shape |
 Control Room 2 |  Control Room 1 |  Curved floor 2 |
 Curved floor 1completion of the sub-floor |  Metal table |  Angle grinder 2 |
 Close-up cut |  Angle grinder 1 |  22mm Chipboard |
 Rockwool |  Tecsound 50 acoustic membrane |  Joist cap isolators |
 Subfloor panorama |  Hatch 2 |  Hatch 1 |
 Subfloor 6 |  Subfloor 5 |  Subfloor 4 |
 Subfloor 3 |  Rockwool 2 |  Rockwool 1 |
 Subfloor 2Starting the subfloor for the control room. | 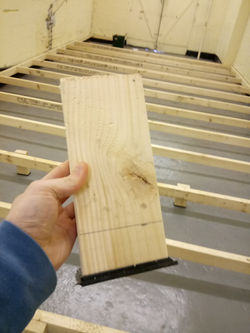 Timber blockTimber blocks that are supporting the joists. |  Subfloor joistsSubfloor of the live room |
 Timber delivery!Howarth delivering our 4x2 timber carcassing |  Architect DrawingFirst draft of the studio design from the architect. |  Drain-pipe diversion 1 |
 Drain-pipe diversion 2 |  Drain-pipe diversion 3 |  Drain-pipe diversion 4 |
 Drain-pipe diversion 5 |  Sealed gully |  Ventilation planA preliminary design for the ventilation system. |
 Ventilation attenuatorUsed to minimise fan noise and assist the acoustic isolation of the rooms. |  Circuit and phase planThe initial electrical plan showing the circuits needed on each phase of the supply. |  Panorama of the unit |
 RA The Book |  Signing the lease |  Design 1 |
 Design 2 |  Design 3 |  Design 4 |
 Design 5 |  Design 6 |  Design 7 |
 Design 9 |  Design 9 control room |  Design 9 live room |
 Control room |  Cross section of the control room |  Floor plan |
 Control room |  Electrical plan |  Between control and live |
bottom of page